On our recent Spring Rendezvous, one of the things we featured was what we refer to as “Pit Cooking,” like most things in survival or living for that matter, it’s not a new concept. What we wanted to show is
- How to do it
- Why you should consider doing it
In our training program soon to be released, to simplify things, we break knowledge, skills and gear into three levels; Core, Efficiency, and Comfort. Passive cooking falls into the Efficiency Level. Let’s get an overview of what passive cooking is and why it is efficient.
Normally when we cook, we are actively tending to the fire, and the food. We make sure to maintain the fire itself or the coals we are using for heat in our cooking, we want steady even heat. We turn the food to keep it from burning. This is the normal way of cooking we have observed all our lives. Passive cooking is simply any method that allows the cooking process to go on without the need of our attention to it.
Why should we utilize passive cooking methods in a survival situation?
Typically when we find ourselves in difficult times, one of the first things we notice is that our time is pressed, that is there is far too much we need to do in the amount of time we have. For example we may need to take care of food, shelter, water, etc. before darkness sets in and limits us. Wise use of our time will allow us to do far more in the amount of daylight we have.
An Example
In our recent Rendezvous the method we chose for passive cooking is “pit cooking,” which we modified to trench cooking. The process is fairly simple and consists of three steps.
- Prepare the Pit
- Heat the Pit
- Cook the food
Prepare
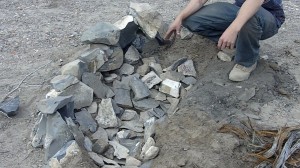
Preparing the pit is simple, just dig down about 18 inches, and about the same width, we made a trench of these dimensions and about 6 feet long, since we were cooking a number of birds. The pit is then lined with stones of at least 2″ thick, we need some mass to store the heat generated by the fire. Flat stones 2″ thick or 2 layers adding up to that thickness or more are ideal.
Heat
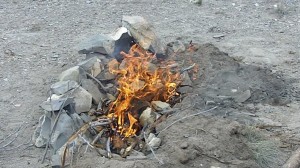
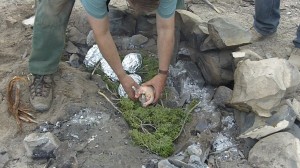
The next step is to heat the rocks lining the pit. Start a fire in the pit and stoke it up with wood of substantial enough size to burn for an hour or so. Depending on your surroundings and setting for your fire, you may also be able to do a few things close around camp while the fire is burning. An hour is generally enough time to heat the rocks sufficiently. What we are doing is not unlike charging a battery, we are charging the rocks with heat energy, and since they are cooler than the fire, heat flows into them. When we put our food on the rocks, it is cooler than they are and heat flows from the rocks to the food. Once the hour has passed remove the fire from the pit to a fire ring for your campfire. Depending on what vegetation is available, line the pit with leaves, boughs, bark, etc. I sometimes put a thin layer of dirt on the stones before adding vegetation. The green vegetation layer should be about an inch thick. Place your food next then cover with more vegetation, then cover the whole thing with several inches of dirt. It should go without saying that the vegetation should not be poisonous or irritating, no poison ivy for example.
Cook
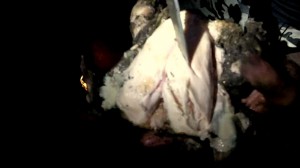
Let your food cook for several hours. Three and a half hours will cook a chicken sized portion. If your food is in smaller chunks it may cook somewhat faster. When doing an animal such as a larger sized bird, put a rock inside the cavity, this helps to also cook from the inside out. The cool thing about this method is that your food is unlikely to ever burn, since the rocks start out hot and cool over time as the cooking proceeds. So it’s not too critical if you leave it cooking for a longer time. The food being in the pit, sealed with dirt, it will generally stay moist and juicy. Carefully dig into the pit to remove your food, when you are ready to eat.
TIP– If it is cold weather you may even opt to use the hot rocks under your bedding to keep you warm, just cover with a bit of dirt to insulate so you don’t get burned. You can even make your bed right on top of the pit after you get the food out. Just fill it back in and you are ready to go.
While your food is cooking you have several hours to do necessary things, you can gather firewood, find water, make shelter, etc. If you are practicing this in a area that is sensitive to damage, you can carefully remove the surface grass (sod) and set it aside in the shade, then when done allow pit to cool, fill in with dirt and place sod back on.
If you haven’t seen our video on this check it out here
Until next time this is Perry Peacock for Wilderness Innovation, “Simplifying Survival”


