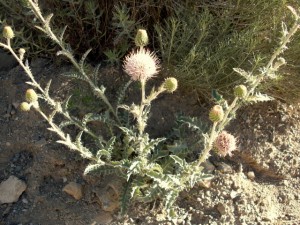
There are many varieties of Thistle in North America and around the world. In this post we are covering the varieties in North America. Though all seem to be similar.

This plant is normally considered to be a nuisance due to it’s prickly nature and how quickly it spreads into areas around civilization. However, to the person lost in the woods, the abundance of this plant can truly be a lifesaver. It can be a valuable source of food.

This is borne out in the following story.CIMG3792
From the early 1800’s there were seeming mystical stories of a land in the West full of boiling mud, hot sulpher, geysers and many other wonders. People wondered if it was true or just some wild story. So in 1870 a group was formed to formally investigate what is now Yellowstone Park, in Northwest Wyoming.

One of the party members Truman Everts became separated from his party. A storm came up and somewhere along the line his horse bucked him and the resulting fall shattered his eye glasses. He was quite nearsighted and could not find his way.

Soon he was starving, cold from the snows, and had become badly burned from hot vents in the earth. Eventually he started eating the roots of a large thistle. This evidently saved his life. He was finally found 37 days later by a 2 man search party.

The roots of the first year plant, that is a plant with base leaves and no stalk, are edible, readily available, and tasty. The young green leaves can be used as salad greens after trimming the barbs on the leaves. The young stems on 2nd year plants can be peeled and eaten. Also the seed pods can be eaten when peeled and prepared like an artichoke.

The best plants as for flavor and tenderness are those growing in areas that are a little more moist. The roots are easy to prepare and can be eaten raw or cooked. Cooking breaks down the fibers in the plant and thus softens it, making tougher plants more palatable. If the only plants that can be found are tough, just boil them till tender.

Native Americans used the plant sap on cuts and sores. They used the stems extensively, peeling and eating them.

Wherever you can find Thistle, you can at least be assured of having a meal to keep you going. Learning what plants are edible is just like anything else, you start small and add to your knowledge a little at a time. Thistle is easy to recognize and a good place to start learning edible plants. Now go find some Thistle, and experiment with preparing and eating it, this knowledge will give you confidence.

Watch our Video on Thistle, click here

Until next time – Perry Peacock, Simplifying Survival

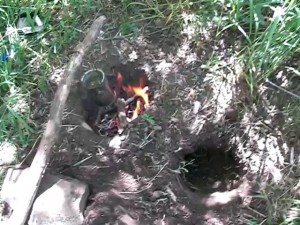
Dakota Fire - Air feed on right, fire on left

Dakota Fire - Air feed on right, fire on left

I always thought of the Dakota Hole Fire as something mostly for stealth, when I wanted a fire, but didn’t want others to know, it is that, but also much more.

What are the reasons to build a Dakota Hole Fire?

  • To have a fire that is not easily visible to others
  • For a safe controlled fire in windy conditions
  • Efficiency, cooking can be done with very little wood
  • To leave an area visibly untouched-have a fire and leave no trace
  • Ideal for use in partially sheltered conditions, like a lean-to, under a tarp or other open shelter

Let’s talk in a little more detail about each of the advantages of the Dakota Hole Fire

Stealth and Leave No Trace – Too many times we picture a fire as in the paintings of artists,  like a blazing bonfire lighting up the night sky. There is nothing wrong with this at the appropriate time,  but when out scouting or in a survival situation, it can be too much work and way too visible. A Dakota Hole Fire can give warmth and provide cooking heat for hours on end with a very small amount of wood. Small pieces are all that’s needed. When you are done with the fire, just fill in the holes, smooth over, replace sod if any, and no one will know you were there.

Fire in Windy Conditions – A Dakota Hole Fire can work very nicely in windy conditions that make standard fires difficult to light and control once going. This type of fire also contains most of the embers and sparks and so reduces the danger of the fire spreading. The whole fire is below ground level, oxygen is fed through the air feed hole. I have started the fire down in the hole, so that it is contained beginning to end.

Efficiency – There is no fire that is as effective with so little fuel. You can cook and heat with nothing but twigs and small sticks. This fire is kind of like using our Twig Stove. All the heat of the fire is contained in the hole, it’s only escape is straight up. Meals can be cooked in a can or pot hung from a stick or you can fashion a grill of green sticks. You don’t want to spend all your time and energy gathering fire wood, so this fire is ideal in survival situations.

Use in Open Shelters – Since the fire is so small and is below ground level, it is safe and effective for use in partially sheltered conditions. I have used it under a tarp, in a lean-to and debris hut very successfully.

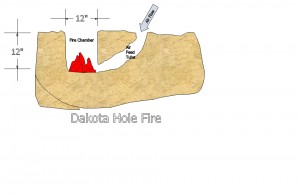
Dakota Hole Fire Diagram

Dakota Hole Fire Diagram

The Dakota Hole Fire is a great fire to build, not too many people ever use it, which is too bad. It is very simple to construct and use.  For survival training practice making it and using it. See the drawing and photo for how to lay it out. We also have a video posted on our YouTube Channel [link] that shows how to make it using scavenged tools. Try it sometime, you’ll like it.

Until next time this is Perry Peacock – Simplifying Survival

Why did Matches lose their luster? When I was growing up in the 50’s and 60’s, camping and more particularly fire-starting was all about starting every fire with just one match. Whether starting a fire in the fireplace in the house or out at the campsite, the training was focused on the 1 match method. We got some decent tinder, and kindling in graduated sizes. With a match we had to carefully shield from the wind, that was the biggest threat in those days generally. In scouts we learned to make the “fuzz stick” which was very effective tinder, although not heard of so much these days. The only other real hassle with matches was if they got damp, the heads would fall apart and they were pretty much worthless. That was easily overcome with waterproof containers or dipping the tips in wax.

It seems we all get into either tech or ancient when it comes to fire starting, it wasn’t that long ago that flint and steel was the common method

European and Colonial fire starting

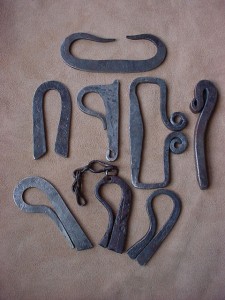
I have read the procurement logs of some early explorers and trappers, they would order fire steels by the dozens or hundreds. I have some steels patterned after Roman designs from medieval times, these are very quick and effective. With a properly made fire steel, a small piece of flint, and a little patch of char cloth, it is incredibly easy to start a fire. It is one of the easiest methods of fire starting there is.

What was the demise of flint and steel?

Mike Ameling's Roman fire steels

Mike Ameling's Roman fire steels

It was the wooden match  A match is great because it contains all the elements needed to start a fire  There is the striker and flame producer, the head of the match (chemical). The head is molded onto a wooden stick which provides a handle and dry tinder. If properly set up, one match is all you need to start most any fire.

History of Matches

The discovery of Phosphorus is credited to H. Brand of Hamburg. In 1669 he was trying to find a way to turn base metals into gold. In those days people tried anything, so  it’s not too surprising what he did. Brand had saved up a vat of urine and allowed that to putrify, then he cooked it down to a paste, pretty gross to think about!! He heated the paste and condensed the vapors through water, giving him not gold but a white waxy substance that glowed in the dark, now you know how to make phosphorus, haha.

In 1680 Robert Boyle put phosphorus on paper and sulfur on a sliver of wood and found that it burst into flame when drawn across the paper. This never became popular since there was still not an effective way of producing phosphorus en mass.

It was not until 1827 that Robert Walker made practical matches, they did have one drawback, a very strong stinking odor, this was remedied by Charles Sauria in 1830 who used white phosphorous, however it’s side effect was that it was poisonous and caused defects in people who were exposed to it. Those who manufactured these matches, men, women and children got paid less than $1.25 a day, and got “Phossy jaw” a condition where the jaw cartilage disintegrated, leaving them, unable to speak and deformed.  In 1910 Diamond match patented the worlds first non-poisonous match. This was so momentous that President Taft persuaded them to release the patent to the world for the sake of humanity, which they did. Diamond Match makes some 12 billion matches each year.

An alternate type of match was where the wood stick was replaced with a cardboard handle and they were stapled together in books called obviously, book matches, very convenient, but very susceptible to moisture problems. Initially these “book matches” were designed such that a person would light the whole book at once, a great fire starter, later the striking surface was placed on the outside and these matches were then used one at a time. When I was much younger I learned from an Australian guy how to start two fires from each book match, you just separate the cardboard layers in half and so you have 2 thin cardboard handles with half a head on each. It’s cool, try it!!

Wooden matches have really only one downfall, and that is keeping them dry out in the woods. If they get wet, they are worthless.  They can easily be wax coated to solve that problem. Hurricane matches are just wooden sticks with a much longer head that is formulated to burn even with wind and moisture present.

Today the most common method of starting fire is the lighter. For the outdoorsman and survivalist, many other methods are studied and employed as a backup to lighters, metal matches (ferrocerium rods), magnesium bars, pistons, bow drill, etc.

Wooden matches are still a viable option. they are inexpensive, very effective, and easily available. With a lighter if the flint or valve mechanism breaks, its over, with a match if one fails just grab another. All your eggs are not in one basket.

Simple waterproofing can be done by dipping the end of the match in parrifin wax. (See our video on some options, coming shortly, check this link again later) This has the added benefit of enhanced burn.

It has been years since I started a fire with matches or even lit a stove, until just recently when a little bit of a taste for stuff from the “old days” hit me. I’ve had some fun reliving some of those experiences, and even gained a new appreciation for what not too long ago was a miracle. Don’t feel bad if you want to use matches, it’s still a good thing. Practice with everything you can.

Diamond Match makes 12 billion matches each yearUntil next time, this is Perry Peacock – Simplifying Survival

With practice comes improved ability and that increases confidence, which bolsters attitude – Perry D Peacock

In our time there is so much technology that it is astounding, we come to depend a great deal on it. I once took a survival class from Jim Phillips, he emphasized that everything made by man comes with an unwritten guarantee, to fail when it is needed the most. We all commonly refer to this occurance as Murphy’s Law. There is always something out there lurking to knock us down or stall us in our progress. There is always an opposition that we battle against.

I recall a time in my younger days when I was out with some friends in some remote mountains, we were scouting for deer. Due to rainy slick conditions we were unable to drive to where we planned. We wound up hiking in to take a look, with the intention of getting back to the truck to set up camp for the night. We spent too much time up there, conditions worsened, winds kicked up, temperatures dropped to near freezing. Ultimately going back to the truck was not an option. Since we were poorly dressed for the conditions a fire was needed. We really struggled, trying time and time again to get a fire going. We had all started fires many times, but never in these conditions. We got down to only one more shot at getting the fire going, we prepared tinder and kindling like never before. At last a fire was going, we sheltered it and ourselves and made it through the night and the snowfall that came.

In this story we very nearly didn’t make it, we got down to the last chance to start the fire. I learned from this experience, to be properly clothed, to learn to start a fire in most any condition or to shelter so as not to need fire. How did I do it? Read on.

With Practice comes improved ability, and that increases confidence, which in turn bolsters attitude.

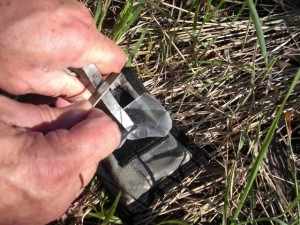
Using our Magnesium Fire Starter Kit

Using our Magnesium Fire Starter Kit

I used to speed hike in the mountains near my home. I made a practice of hiking up the mountain and at the turn around point, I would start a little fire, many times right on the trail. Nothing big, just enough to get a flame going. Then I put the fire out and headed back. Over time there were all kinds of conditions I built fires in, rain, snow, wind, good weather and bad, dry materials and damp. I found that if I persisted I was able to learn to deal with quite a variety of conditions successfully.

One year our family took an extended vacation where we traveled all through the Western U.S. and Canada. We tent camped through the whole trip. I was able to get better and better at setting up camp and taking it down quickly and efficiently. I would fold up the tent in a certain way, so that when I unrolled it later I knew where the door would be. Organization in how things were packed also evolved during the trip.

Everything we do can be done better with practice.

How is the best way to practice all these things?

I have a rule when camping, we use no matches or lighters for fire starting.  As a result everyone learns to use a Magnesium fire  starter, or flint and steel, or piston. If a fire can be started with these methods, its not difficult to use conventional methods. By practicing we learn when things are easy and not critical, rather than being out in life or death conditions trying to learn.

One interesting thing I’m doing this year is at our family reunion. We are in charge of  it so I thought to make it more interesting, lets set up a scenerio where we have all had to evacuate to the mountains. We are going to practice using 72 hour kits, Bug out Bags, Survival kits, medical kits, food storage etc. I am lining up training sessions for all these areas. We will do some games and things like that just to keep things light and fun. The goal is to get everyone thinking about what they have and what they need realistically. So by practice at the reunion, everyone can improve on their readiness, both in gear and supplies and also in skills. I will do an evaluation in a couple of months  to let all of you know how it went.

One final benefit of practice is we are able to weed out equipment that we find does not work well, now is the best time to find that out and make corrections.

So practice, practice, practice.

Until next time, Perry Peacock, Simplifying Survival

It’ s been said there is no such thing as bad weather

As a kid for some strange reason I always loved to be out in bad weather, especially the cold. Eventually I learned to enjoy living in the cold, the snow and winds. It’s really a perspective that’s shaped by our experience. It’ s been said there is no such thing as bad weather, just different kinds of weather. I don’t know if that’s totally true, depending on where you are, a hurricane or tornado can certainly be a terrible deadly experience. But in general if we learn and prepare we can learn to love most kinds of weather.

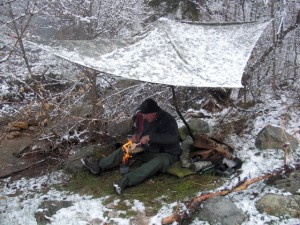
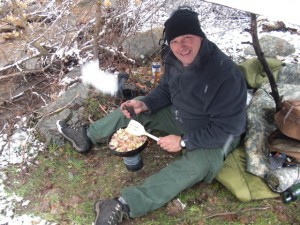
Cooking under the Personal Survival Tarp

Cooking under the Personal Survival Tarp

Years ago I had an eyeopening experience. Our family had taken a tent camping vacation in the Rocky Mountains of Alberta and British Columbia. It wound up being 2 weeks of rain. About a week into it we were camping at Rocky Mountain House in Alberta. I started looking around at other campers in tents like us, they were having a great time. That got me wondering, so I became quite observant and started to learn by watching them. What I found was that with proper preparation and gear cold rainy weather can be fun. It does take an attitude shift as well, I might add.

Since that time I lived some years in the Southeast U.S. where rain is a way of life. I learned that it is truly possible to make a great experience out of a rainy week, even in a tent, cooking,  hiking and most of the normal things we would do. In fact I found that much of the scenery and wildlife takes on a different interesting look, sometimes there is  a certain quiet in the woods at these times.

Like most things  we just have to stop and analyze the situation. What is it that makes cold rainy snowy weather unpleasant? 1-Getting wet clothing, 2-Cooking and eating in the wet, 3-Activity limitations.

The primary unpleasantry is getting wet, and that means clothing, sleeping gear, cooking gear. This can be solved by getting some comfortable rain gear. I would not worry too much about expensive Gore-Tex type clothing. It does not work that well on an extended basis. The best thing is good rain clothes that are well ventilated. Include some water resistant foot wear as well.

The next item would be some type of a tarp, like our new Personal Survival Tarp, being introduced soon. It’s nice to have so you can see the outdoors, rather than being confined in a tent. With a good tarp setup you can sleep, cook, eat, and hang out without feeling trapped. I would rather use a tarp than a tent most of the time, it’s more flexible, more open.

So really with a couple of items, good rain clothes and a tarp setup, you can change cold rainy snowy weather into enjoyable times. You can hike and backpack in the rain, you can set up camp in the rain, you can cook, eat and sleep in the rain. And the big miracle is when you learn to be comfortable, you will find beauty and great experiences.

Happiness!!

Happiness!!

Once you have the gear, the next step is gaining experience, and that’s the fun part. Get out in it, it’s exciting when you start hoping for some weather most people think of as bad, so you can go out and try some things. At first stay close to home, do some daytime things, then work into overnight and multi-day treks. That way if things don’t work out at all, just go home and try again next time. This is the easy way to get experience.

Check out our new video Breakfast in the Spring Snowfall

Get out in it. Until next time – Perry Peacock

SODIS is a term to describe “Solar water Disinfection”

While doing some research on water purification I came across information on solar methods. Many of them were quite expensive and others of dubious effectiveness. I found some information on a method used in many developing countries. The problem was the device had to be cheap in order to be made widely available and it had to work very well in an uncomplicated manner.

So What is it?

Clear PET bottles are used

Clear PET bottles are used

This method was developed by the Swiss ewag aquatic research It involves using a clear plastic bottle, made of PET plastic, the kind used for bottled water. This plastic has been tested to be safe for use long term. A bottle is filled with water and laid on it’s side for maximum exposure to the sun. 6 hours are needed to do the job, more if partly cloudy sky during the day.This method works to kill the organisms that cause: Cholera, Typhus, Dysentery, Diarrhea, Polio, and Hepatitis. It also takes care of parasites such as, Giardia, Cryposporidium, and Amoeba when process is done as shown. See this link for Microbiology details.

How does SODIS work?
According to research the UV-A rays from the sun react with the oxygen in the water to damage cells in such a way that they are not able to recover. So how’s that for green technology?

Using the SODIS method for your own Survival or Preparedness
Don’t throw out all the Clear soda bottles or water bottles. You can clean and fill these with clean water for emergency use, when a bottle is emptied during an emergency, just refill it according to the instructions provided. Each day you may easily purify many gallons of water for your family.

One of the advantages to this system is conservation of fuel for cooking, etc. Also the water tastes good, versus the flat taste of boiled water or the chemical taste from other methods. There is not a limit either to how much water you can purify like there is with filter cartridges.

For full details click the following:
Our video showing how to use SODIS
Full documentation and poster showing the simple steps

Doing our best “Simplifying Survival”

Until next time – Perry Peacock

How do I Know, When does Survival start?

This may seem like an odd question to ask, yet the answer and it’s timing can make the difference in life or death. In a previous blog I wrote about paradigm shifts, which is basically to say we change our view of things when we go into survival mode. Delaying this shift in thinking can cause fatal procrastination in shelter building, obtaining water, or personal care. So just how do we know when to shift into survival mode? Let me illustrate this with a story of an event that happened to me last week.

I had recently found a canyon to ride my mountain bike in that had a great trail, twists, turns, creek crossings and all. I had been on the trail a couple times already and wanted to explore further on each of it’s two forks. It had snowed and rained the previous couple of days and although most of the snow was melted, there were still patches everywhere. The stream, now many times it’s normal size with snow melt runoff, was still passable.

I rode my bike further up the left fork than I had previously been, and shot a couple of videos for use on our YouTube channel. The sun had gone down while I was just getting started, due to the steep canyons, but I still had time to ride in the daylight.

I was dressed for cool weather, my 60/40 pants, wool socks, a Tee shirt, and a cotton hoodie, I also had a fleece cap in my Camelback. On my handle bars I had secured as usual my Wilderness Innovation Off-Road Survival Kit.

On the ride up the canyon, I had for the most part portaged my bike across the stream, due to the high water, there were about 15 crossings to be made. When I started back down I figured to ride most of the crossings, being that I was going downhill anyway and would have some momentum with me.

I made the first few crossings nicely, then there was a long traverse as the trail descended, soon I came upon my next crossing, it was deep, but looked doable and I continued into the water. At that moment I noticed something in the water, a large pothole midstream, which at this point was too late to do anything about. In an instant I was thrown over my handle bars and headlong into the icy water. I suddenly stopped as my right shoulder hit on a boulder under water. I felt sharp pain. The water was flowing over me as I struggled to get up, not being able to use my right arm.

As I was able to get up I saw, my bike upside down, wheels in the air. I noticed my Survival Kit still fastened on the handle bars. I dragged the bike and myself to shore. My right knee was hurting pretty bad. One of my first thoughts was, if I can’t make it out I will have to start a fire soon, to get warmed and dry out. The air was already beginning to chill into the 30’s. It was a relief to know I had the survival kit, at least I could get a fire going and get some basic shelter if I needed to.

I determined that if I could get out of the canyon to my truck that would be best. I would start down and see how I did, if I felt like I couldn’t continue, then a bivouac would be made for the night.

My shoulder was dislocated, so I knew I needed to try to get that fixed, and after swinging my arm around a bit it popped into place. Now how was my knee? It really hurt to walk on it, but I figured if I could get onto my bike, I should be able to coast most of the way down and would only have to walk the crossings. That seemed to work, but the shoulder pain was intense and my right arm was only used mostly for the brakes.

I was able to successfully get out, I was pretty cold, sore and in pain, but I made it. As I reflect back I am pleased to note that instinctively, one of my first thoughts was sheltering up for the night. I was ready to stay the night, I had to talk myself into continuing down. I felt good that I made the shift to survival mode at once, automatically, I would not risk further danger by continuing if it wasn’t safe.

Train yourself to be ready, not to go on, but to stay and to shelter if that’s the safest thing to do. Avoid the need to press on, sometimes it can be deadly.

Until next time – Perry Peacock, “Simplifying Survival”

Evolution of the Twig Stove
For me it all started in the 70’s. My grandpa Peacock was a Beekeeper as a profession and my dad did it as a part time job while working towards his retirement at age 50. I worked in the business a good part of my growing up years. I was always trying to improve something, lazy, haha. One thing was the smoker, a can like device with bellows that also served as a handle. The fire chamber was typically filled with burlap and started on fire. the lid with a small hole was closed. Not enough oxygen was present to flame so it would smolder. Squeeze the bellows and a puff of smoke came out. This had a calming effect on the bees.

I had an idea to make the handle a battery case and to install a small fan on the side of the smoker cylinder near the bottom. Light the burlap as usual, then for a puff of smoke press a button on the handle, the fan would pulse on. The design was great.

As I got into High School, I really got into hiking and camping, which continues to this day. In the early 80’s I remembered the smoker design and decided to modify it for use as a stove.

It was astounding in it’s heating ability, well actually too good. I melted my first stove. So I had to make the fan smaller, still a bit much, so I put a speed control on the fan, excellent.

Until recently I made my own fans with small DC motors from Radio Shack, to which I soldered a fan blade fashioned from a piece of tin. This arrangement worked very well.

We have now substituted small pancake fans like those used to cool computers.

Exactly What is a Twig Stove?
It is a metal cylinder (48 oz soup can) with the lid cut out. A hole in the bottom to mount the fan over. There is a feed hole near the top for adding twigs while cooking. Inside a grate is formed by punching a bunch of holes in the lid that was removed from the can. Several nails or metal rods are bent and fastened to swing to adjust for the size of cup or pan used in cooking. Whew!! That’s it.

What makes the Twig Stove so Appealing to use?
It’s light weight at just over 9 ounces (255 grams) is certainly appealing, combine that with its totally hollow interior that can be used for storage means it is light and takes almost no space. There is no fuel to take, about any little thing that burns can be used, Twigs of course are great. You will need a battery, we use 9 volt, and that will last for hours and hours of cooking. It only takes a handful or two of twigs to cook a meal. Works great in the wind. It is cheap to make or you can buy one from us. The Twig Stove is safe, no fuel to spill or explode, no gas cartridges to dispose of. After initial starting, the stove can operate nearly smoke free, relying mostly on a bed of coals.

Check out the videos on the amazing Twig Stove, we have several already and more will be added from time to time.

Info on how to make your own Twig Stove

Buy a stove already made

We are really Simplifying Survival with this stove.

Until next time – Perry Peacock

…and a new product we are refining, a Survival Blanket

A while back we did a video on Youtube, a little Quick – Tip about the spring season. Spring is always the wonderful time of year. Snows and cold recede and slowly fade away as summer approaches. The grass shoots forth, trees bud and bloom, all life is seemingly regenerated.

This blog is a follow up on the last one dealing with this time of year specifically and in more detail.

In winter the snow is cold and while temperatures remain in the 20’s and below, it is in reality a dry time. Typically spring is a time of moderating temperatures and rains. Spring can be fickle with cold one day and warm the next. This presents a hazard to those who spend time outdoors.

The Problem
Rain combined with cold can be difficult to deal with, and in many ways more troublesome than sub-zero weather. I read a book years ago where a doctor studied the results of a distance sporting event in Scotland, where athletes became hypothermic in what was considered mild weather. The factors were rain and storminess, and although not severe, they had a tragic effect on these athletes.

If you have watched a blacksmith you will note that he works steel that is red hot, he can quench this in a bucket of water, and in seconds it is cool enough to handle with bare hands. This is the tremendous heat conducting capability of water. Water can conduct or absorb heat 30 times better than air. If you think of water taking heat away from your body, you can imagine a continuous filament of water between your skin and the cooler air, your body’s heat will travel on this filament from your skin and dissipate into the the cold surrounding air. This is wonderful if you are hot, but quite dangerous if you are in colder conditions.

Rain and general wetness of the environment when combined with cool air temperatures can create situations where hypothermia can easily occur. We commonly talk of the dangers of hypothermia in very cold winter conditions. I believe it is much more a danger in wet conditions where the temperatures are say 30 deg F to about 60 deg F. Most of the reasoning for this is we are not as well prepared to deal with the wet cold.

Solutions
You must do all you can to stay dry. Overexertion can cause excessive sweating which in turn accelerates body heat loss. If it becomes rainy use a raincoat or wait it out in shelter.

We have been conducting tests adapting some clothing and shelter materials that we have used for decades in Sub-Zero camping and living.

We consider the use of cotton as a taboo in winter, and this carries over into spring until temperatures become hotter. I recently placed myself in an overnight test, to rain for hours with temperatures of 35 to 45 degrees F. I had on a Cotton T shirt, Poly/Cotton pants, wool socks
and a new product we are refining, a Survival Blanket made of foam and nylon.

As I retired to sleep, I found the T shirt was terribly uncomfortable, soaking wet and cold, and I removed it. The pants were more comfortable, but because of dampness, I could not get warm while still wearing them, so I removed them. I had on nylon/poly underclothes, they were quite comfortable and did not retain moisture or feel wet. Eventually I removed my wool socks as they were too cold.

Now in just the Survival Blanket which initially was absolutely soggy, yet still reasonably warm. Over time my body heat drove most of the moisture from the blanket, hour by hour I became more comfortable and drier.

So the rules are:
1) Stay as dry as you can, ie, raincoat, tarp or tent.
2) Wear clothing that does not hold onto water, synthetics, poly, nylon, etc.

Check back for progress in our testing.

Stay dry, stay safe, Simplifying Survival – Until next time Perry Peacock

The earth is quite a nice place, but it can also cause us grief.

A few weeks ago in church we sang “For the Beauty of the Earth” and it got me thinking. The earth is a pretty wonderful place, at least what I’ve seen of it.

Laying on the hood of a car at -40 in Canada watching the most beautiful display of the Northern Lights. Seeing a couple of tiny blue flowers in the midst of a desolate plain. Watching the frothy surf roll in from a South Carolina lighthouse. The light blue waters of the Caribbean. The stunning scene looking across Lake Louise to the snow spotted mountains of the Canadian Rockies…I’ve gotta stop, cause I could go on for quite a while.

When I think about it, there is some sort of beauty in just about every place I’ve ever seen. With all the scenery of the outdoors to look at sometimes it mesmerizes us. We can become lost in the view, somehow it doesn’t seem fully real, and yet it is.

The Problem –
The world is at the same time both rich in its views and smells, and also cruel and unmerciful in its dispatch of those who are careless. We are lured like an insect to a Venus Fly-Trap, enjoying every moment until it’s too late, and snap we are caught.

Many times we just forget caution when we get out exploring, everything seems so wonderful, that it never occurs to us that danger lay all about us.

It can be a hike on a nice sunny day up into the mountains where weather can change in a moment, and we find ourselves not properly clothed.

We can be having a blast way back in the sticks on a rough road, when it all changes with a punctured gas tank, now what was a few hours of fun could be days of walking.

The Solution –
When I was a kid learning to drive on the highway, my dad would always ask questions, “what if that car up ahead came into your lane, what would you do?” There were always what if questions. He was trying to teach me to not only enjoy the drive, but be aware of any dangers and try to decide ahead of time what to do.

I suppose I learned a little from those lessons, I have avoided many dangers in my life. I find myself sub-conscously asking myself, “would that make a good shelter if I were stranded here?” Or, “If the truck broke down right here in the middle of nowhere, what would I do tonight?”

We should not fear the wilderness, but with the main focus of our vision see the beauty, and smell all the natural scents with our noses; and at the same time with our peripheral vision, be looking for shelter, or signs of danger. We should always have a little thought running in the background, analyzing our situation and options. It’s all part of what they call “situational awareness,” it’s a way of both enjoying the surroundings and preparing for anything that might threaten us.

We might just call it “Preparedness on the go.” So yes the Earth is indeed beautiful and we can safely get out in it and return, if we keep our wits about us.

Remember, Simplify Survival, observe, plan, and have a great day!!

Until next time – Perry Peacock

Looking for something?

Use the form below to search the site:


Still not finding what you're looking for? Drop us a note so we can take care of it!

Visit our friends!

A few highly recommended friends...